
If your blog is starting to draw an audience from overseas or you want to collaborate with other schools around the world, you’ll want to find a way to translate your blog into multiple languages.
One of the most common questions we receive from our bloggers is how to implement Google Translate on their blogs.
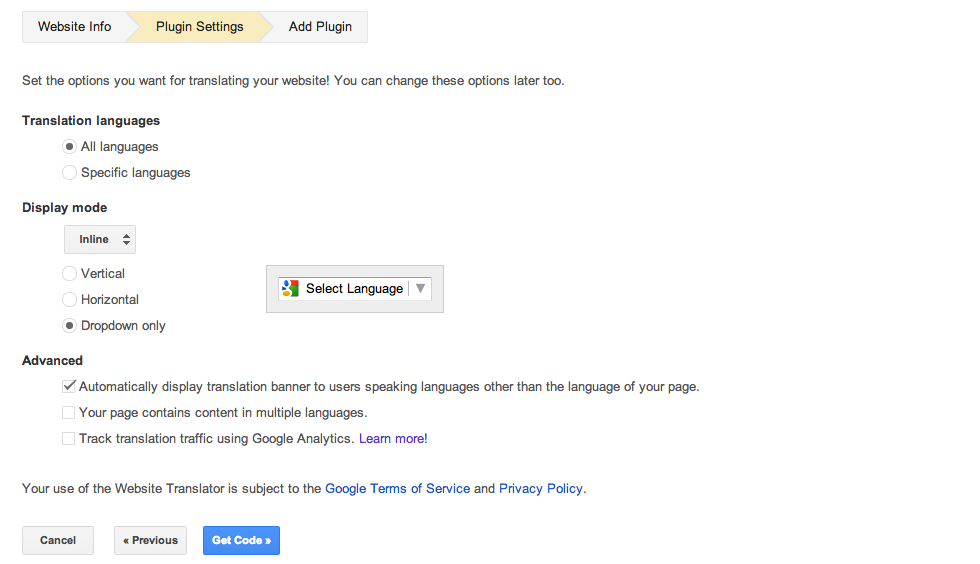
This quick process will help you set up a Google Translate widget on your blog to make it easy for your blog audience to translate your website in a single click.
1. Go to https://translate.google.com/manager/website/add. You’ll be prompted to log in with a Google account. If you don’t have one, you can register for free.
2. Enter the domain of your website (i.e. dleeman.edublogs.org) and select the original language that your blog is written in.
4. Open a new tab in your browser and log into your Edublog.
5. Go to Appearance > Widgets in your dashboard.

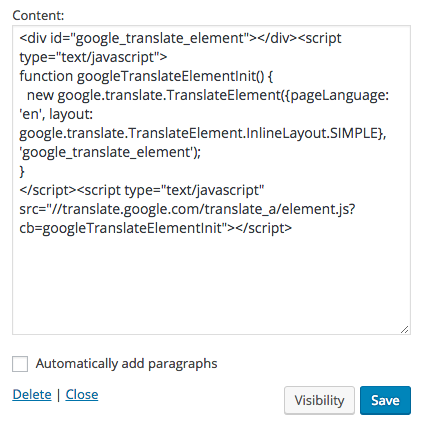
6. Drag a text widget to your sidebar or widget area.

7. Copy the embed code from Google and paste it into your text widget.
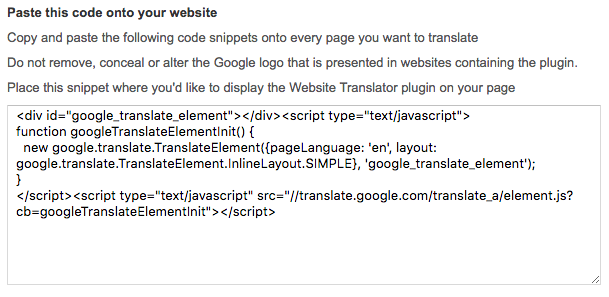
8. Double check to make sure the embed code was copied and pasted into the widget properly, and click “Save.”
9. Reload your blog. You should now see the Google Translate widget in your sidebar.
Now your visitors can click on their own language to translate your blog!